I got well and truly bitten by the autumn bug last month and made almost exclusively orange leaf filled art for the entirety of October, with these two pieces being my autumn magnum opus! I made these two pieces with the intention of turning them in to prints for an up and coming shop update, so the pressure was on to do a good job - the bar is high if your a piece of art with dreams of being a print in this town. So, like most of my art, I started with a mood board. Nothing gets the creative juices flowing like a mood board jam-packed with beautiful colour and textures, little did I know the paper painting challenge which lied ahead…

I quickly sketched out my favourite shapes and did two of the loosest thumbnails, before moving on to painting my paper. I have been known to fill pages with loads of thumbnails filled with different composition ideas, but with these I knew the freedom of being able to move my collaged papers around, before sticking down, would give me a lot of room to play with the composition when It came to the final illustration.


Let the paper painting being


I went in to this painting session determined to do my mood board justice. The success of a collage greatly depends on the quality of the paper you’ve painted going into it. No use trying to collage a pumpkin when your paper is off to begin with, no amount of cutting and glueing is going to fix that issue (trust me, I’ve been there), so I needed to use every trick in my book. Here’s what I did:

Tools
These are all the tools I typically use when painting paper. I do test out different tools every now and then, but these are the techniques I repeatedly go back to.
A big brush which holds a lot of water
An old ratty smaller brush with very splayed bristles (good for splattering and dry brushing)
An old cut up sponge
A card (credit card material)
A glossy piece of paper (I use the back of a postage label, something which repels water slightly.)
Reference image

Technique

End product

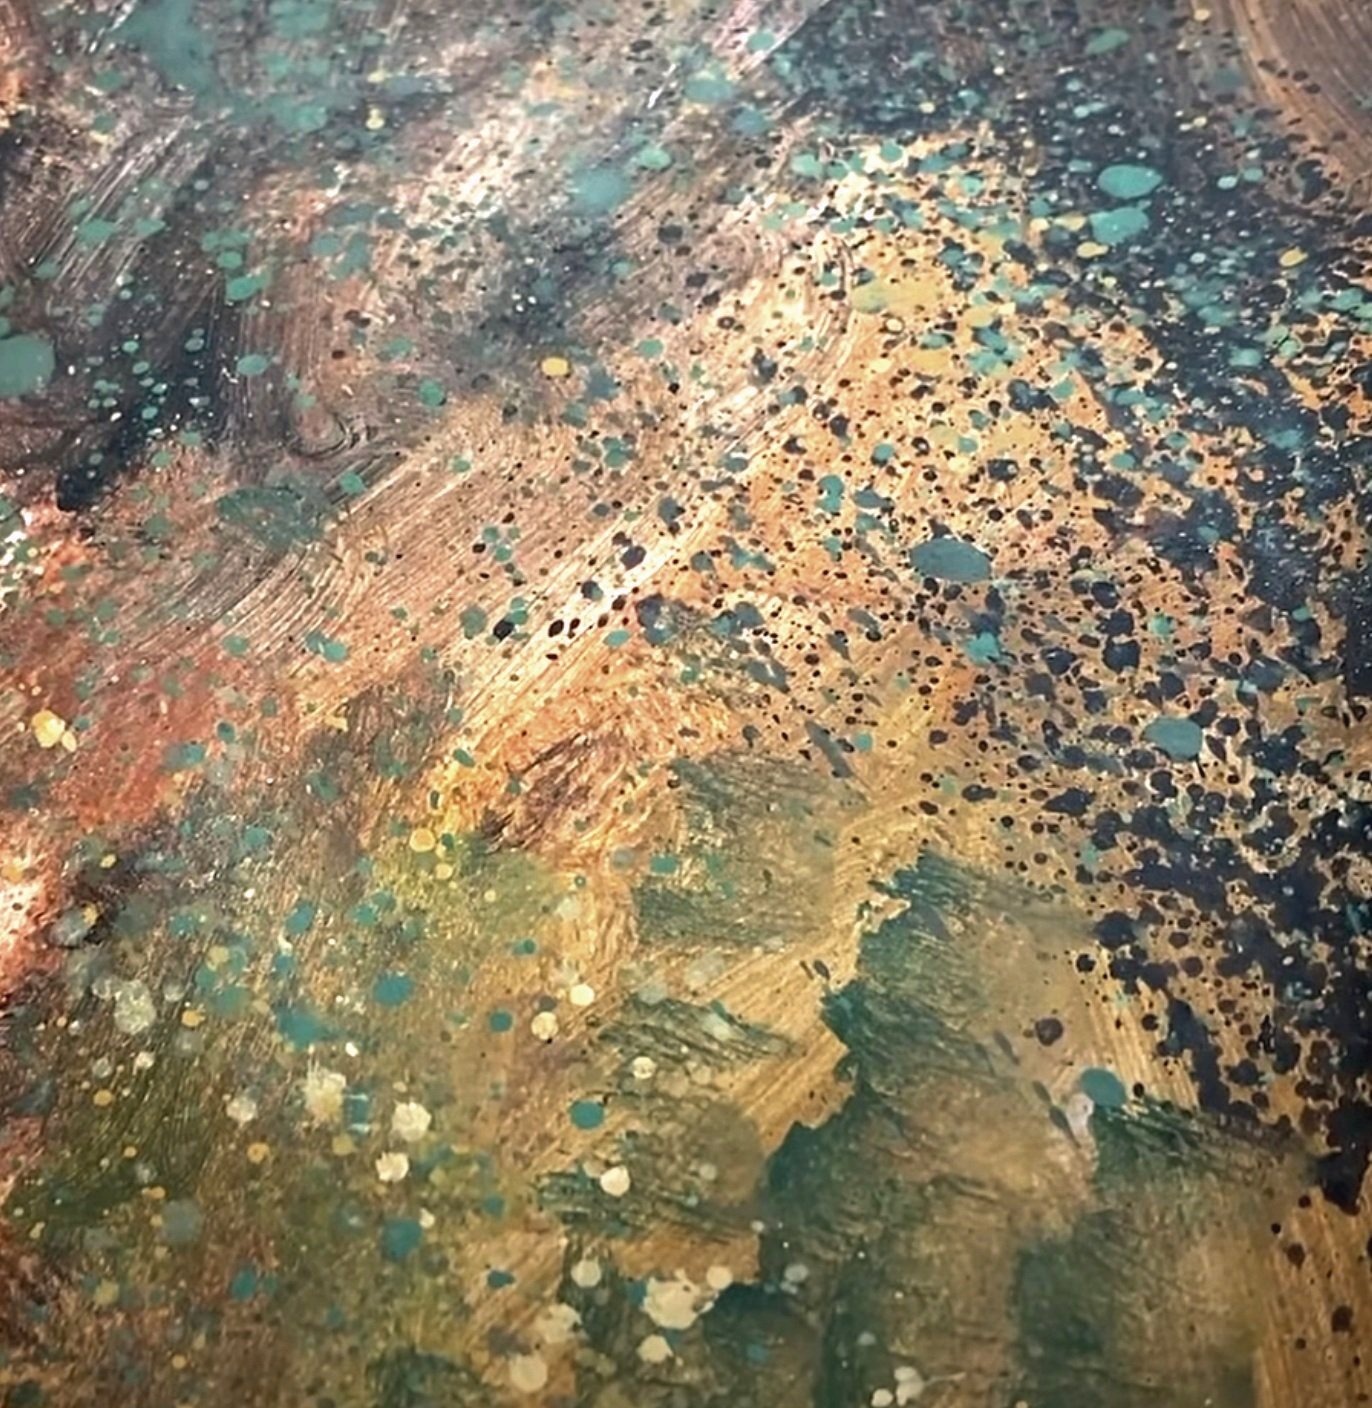
This makes a very good pumpkin texture: Paint one sheet orange with red splatters and let dry, paint another sheet green with lots of paint and sandwich the two together whilst the green is still wet, then peel them apart.
Reference image

Technique


Add some paint to the glossy side of a piece of paper (plastic packaging would work as well) then stamp it on to an already painted sheet. You can run your nails along it to create patterns and peal it off. You can get very different results with this depending on the thickness of the paint and how much you pressed it down.
End product

Reference image

End products


For this texture I painted a sheet with yellow and splattered it with various colours. Once dry I added paint the the edge of a sponge and stamped it on to the paper for the first picture. In the second picture I used the credit card to stamp thin lines.
Here are a bunch of examples of the textures I painted, next to the reference image which inspired them.
Reference image


End product


Lets start cutting!


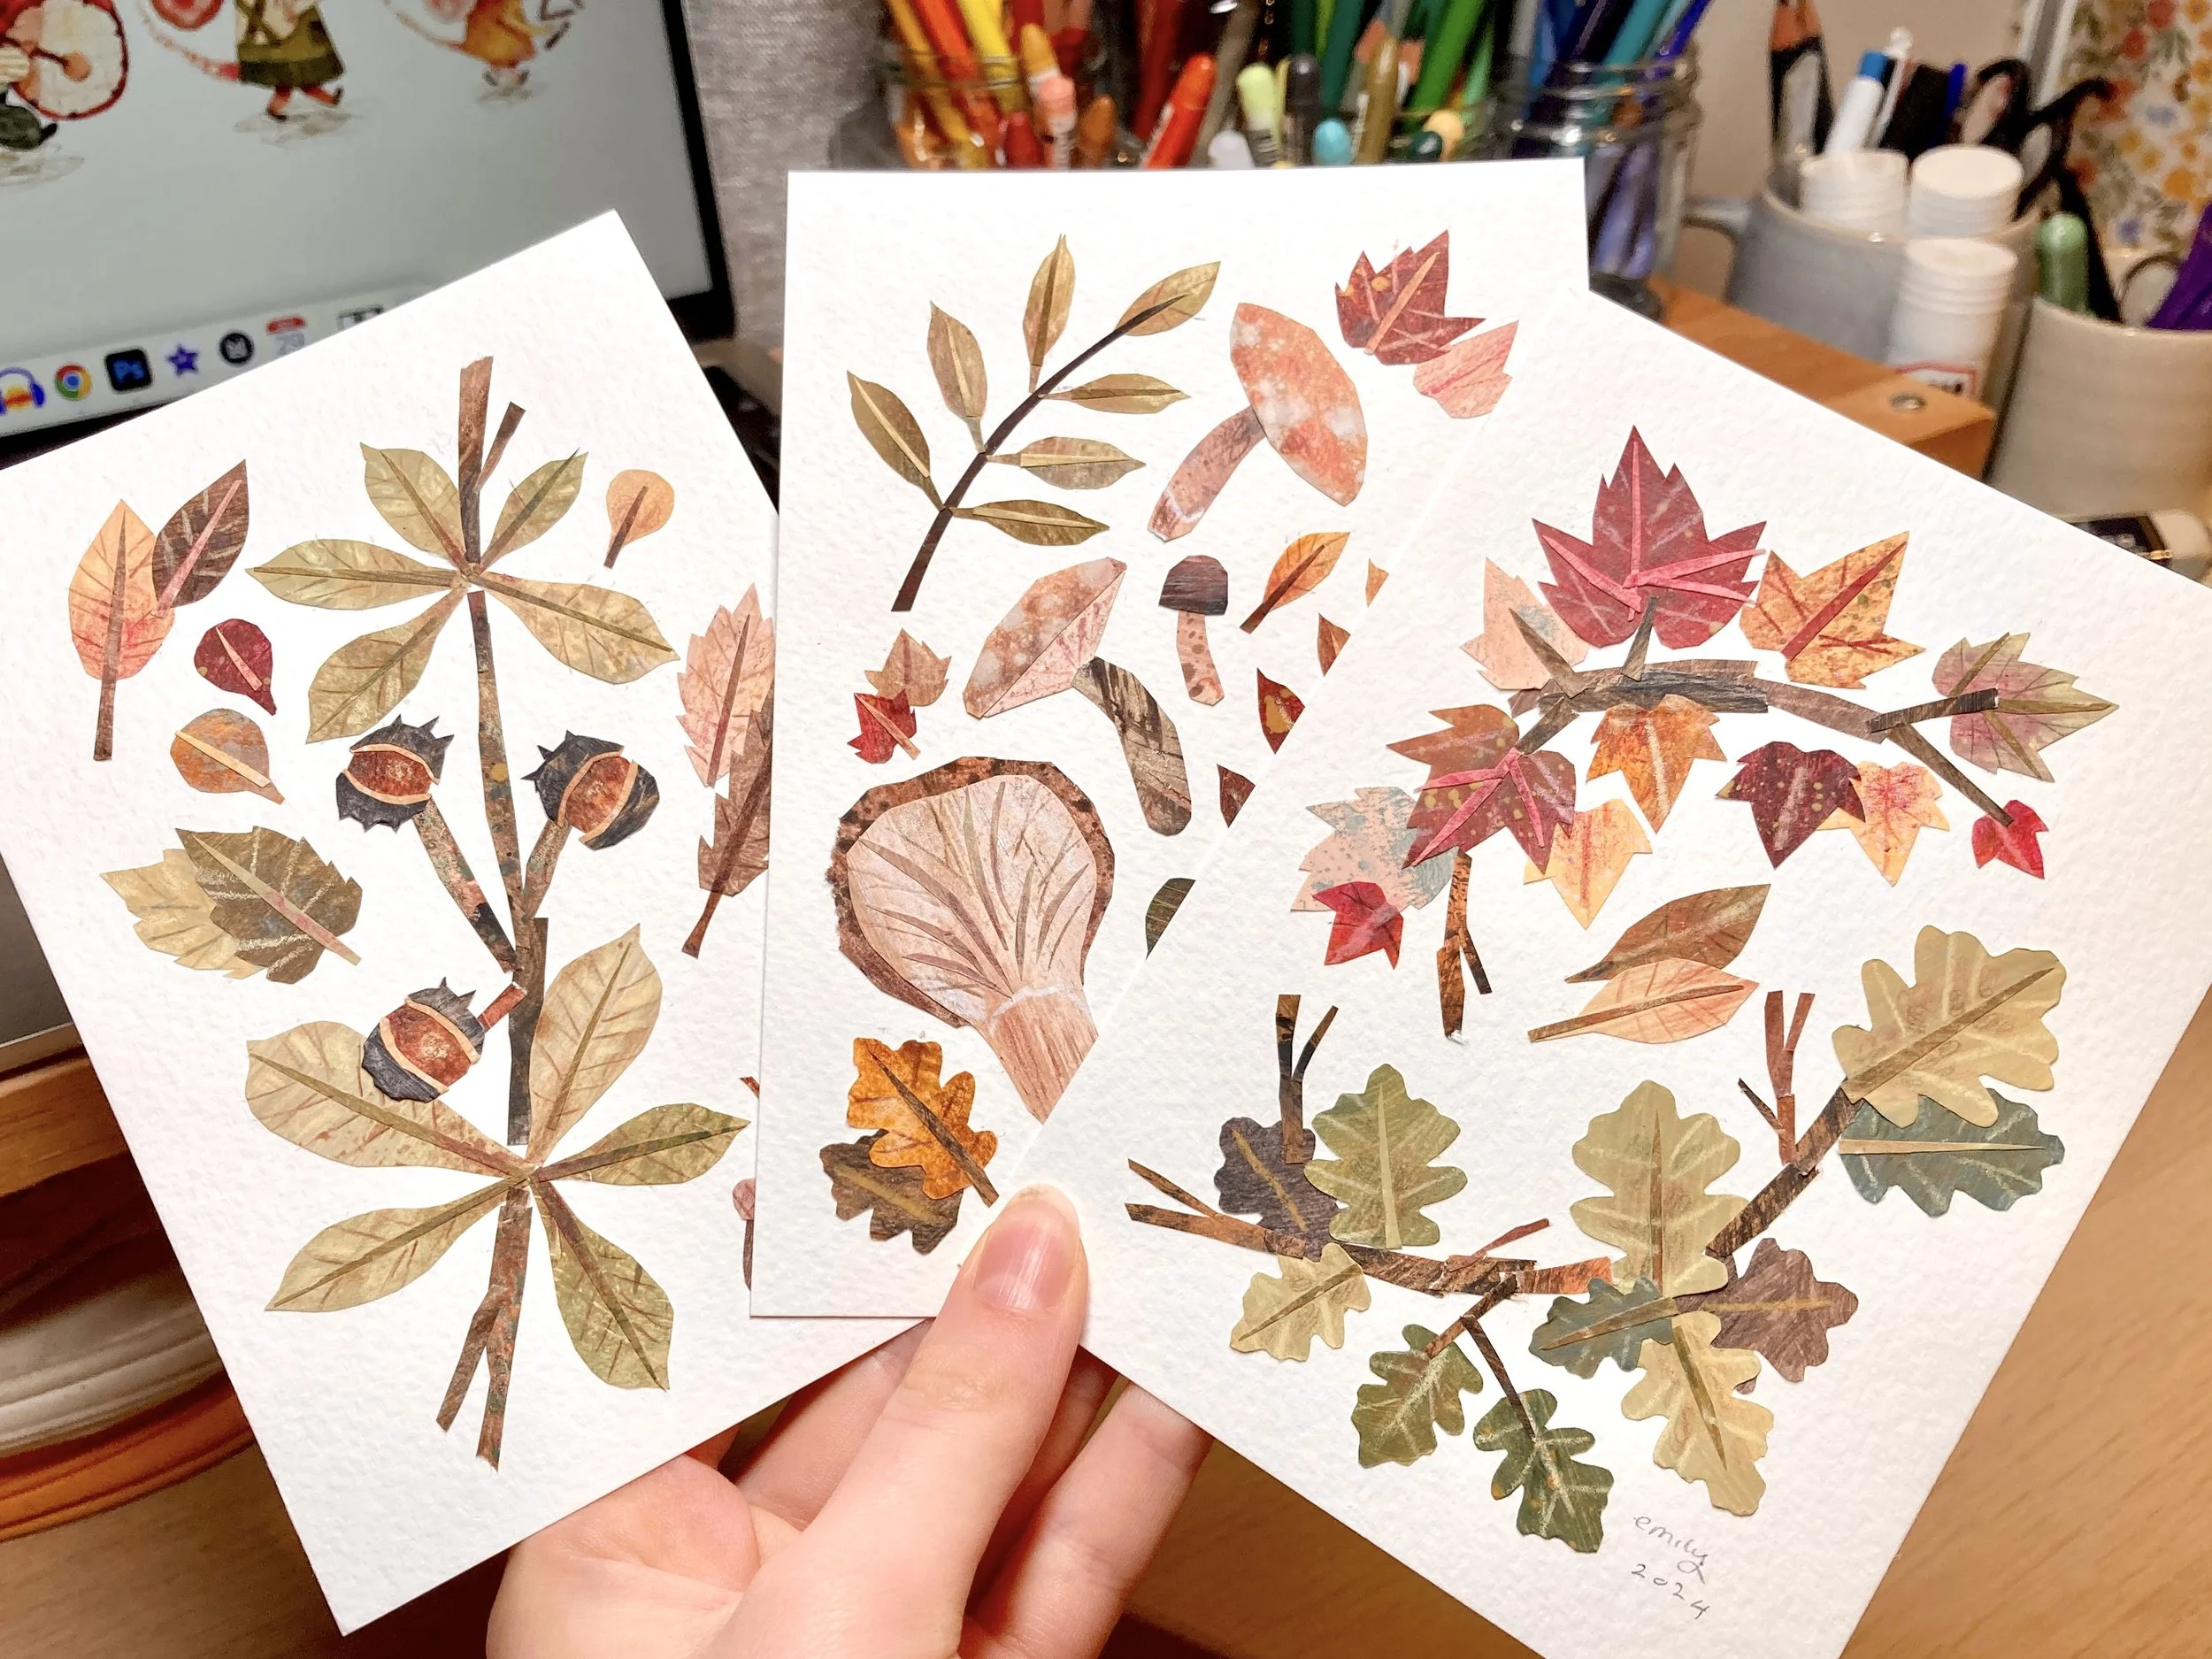
With my textures painted, I moved on to cutting out my shapes. Because I was so thorough in the painting stage, I had a lot of good paper to choose from, making the collage process much smoother. I had all the colours and textures I needed to make a lovely collage all laid out in front of me, so no need to spend ages searching through folders looking for a piece of paper which might not even exist! At this point I wasn’t thinking much about the composition of the piece, and just about the individual elements, cutting out all my shapes first, without a glue stick in sight (well, other than when I was sticking on all the veins on the leaves) This way I could play with the composition without having to commit to anything - one of collages many pro’s.


After I had my leaves all sorted, I moved on to the mushrooms and began sticking all my individual elements down.


One down one more to go
With my leaf piece out of the way, It was time for the main event - the pumpkins! I tackled this illustration in a very similar way to the first, so not much else to repot here!


After a whole week of work, both pieces were done and I couldn’t be more pleased with them. They have so much potential too! With the background being white, theres a lot of room to play around with the individual elements for different product Ideas. I can picture them being a repeat pattern for wrapping paper, or wall paper. I might even turn them In to a mock book cover for a gardening book!


This even inspired a set of smaller collages!